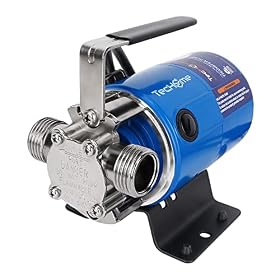
Discharge tubing that is too narrow can sharply reduce pond pump flow and increase resistance. Here is how to confirm the problem, choose a better size, and avoid installation mistakes.
Discharge tubing too narrow for the pump
If your pond pump is running but the waterfall, filter, or fountain has weak flow, the discharge tubing may be too narrow. Small tubing creates more friction and resistance, so the pump has to work against a greater restriction. The result can be reduced circulation, a weaker feature, extra noise, overheating, or premature pump wear.
The best fix is usually to use tubing with the inside diameter recommended by the pump manufacturer, then keep the run as short and straight as practical.
How narrow discharge tubing affects a pond pump
A pump’s stated flow rate is normally measured under specific conditions. Actual flow decreases as water must travel through:
The inside diameter matters more than the outside diameter. Two hoses can look similar while having different usable openings, especially if one has thicker walls.
Narrow tubing increases friction loss. At the same pump speed, less water reaches the outlet. A pump may still sound normal, which can make this issue easy to miss.
Signs the tubing is undersized
Check the tubing size when you notice one or more of these symptoms:
Flow is much weaker than expected
A waterfall or fountain does not reach its intended height
The pump produces less flow after tubing or fittings were changed
The pump is louder or vibrates more than usual
The motor or housing becomes unusually hot
Flow improves briefly when the outlet is moved closer to the pump
A large pump is connected to a small flexible hose through a reducer
These symptoms can also result from a clogged filter, blocked intake, damaged impeller, or air entering the system. Check those causes before assuming the tubing is the only problem.
Product prices and availability are accurate as of the date/time indicated and are subject to change. Any price and availability information displayed on Amazon.com at the time of purchase will apply to the purchase of this product.
How to check whether the tubing is too narrow
1. Find the pump’s recommended tubing size
Look at the pump label, installation manual, or manufacturer’s specifications. Identify the recommended discharge tubing or outlet size. If the manufacturer lists a minimum tubing diameter, do not reduce below it unless the instructions specifically allow that setup.
If the pump has a stepped outlet, use the largest outlet size that matches the intended flow. Cutting the outlet down to a smaller step can create unnecessary restriction.
2. Measure the tubing’s inside diameter
Remove the tubing from the outlet only if the pump is unplugged and the connection can be safely accessed. Measure across the open interior, not across the outside wall.
A hose described by its nominal size may not measure exactly that dimension. Match the actual tubing and fitting sizes carefully, and confirm compatibility with the pump outlet.
3. Temporarily shorten the discharge run
With the pump unplugged before making changes, route a short section of correctly sized tubing to a safe discharge point. Keep the outlet submerged or direct it where splashing will not create an electrical hazard.
If flow improves substantially with the shorter route, the original setup likely has excessive friction, lift, restriction, or a combination of these factors.
Do not operate a pump in a way that can spray electrical connections. Follow the pump’s installation instructions and use a properly protected ground-fault circuit interrupter where required.
4. Inspect reducers, elbows, and valves
The hose may be large enough while a fitting remains too small. Check for:
Product prices and availability are accurate as of the date/time indicated and are subject to change. Any price and availability information displayed on Amazon.com at the time of purchase will apply to the purchase of this product.
Choosing a better tubing size
Use the pump manufacturer’s recommended discharge size as the starting point. If the run is long, the lift is substantial, or several fittings are required, a larger tubing size may reduce friction and preserve more flow.
Consider these factors together:
Pump outlet size: The tubing should connect securely without an improvised seal.
Required flow: Filters, streams, and waterfalls may need different flow rates.
Total tubing length: Longer runs generally benefit more from lower-restriction tubing.
Vertical lift: The pump must push water uphill, not just through the hose.
Fittings and equipment: Filters, UV clarifiers, check valves, and elbows add resistance.
Connection security: A larger hose is not useful if it cannot be clamped and sealed correctly.
Oversizing the tubing is generally less restrictive than undersizing it, but it may require a properly sized adapter at the pump. Use fittings designed for pond or water-garden applications rather than forcing incompatible parts together.
A practical correction procedure
Unplug the pump before changing tubing or fittings.
Close or remove the discharge connection according to the manufacturer’s instructions.
Replace the narrow section with tubing that matches the recommended inside diameter.
Avoid unnecessary reducers and sharp bends.
Secure flexible tubing with an appropriate clamp where the fitting requires one.
Check that the tubing is not kinked, crushed, or pulling sideways on the pump outlet.
Refill or confirm the proper water level before restarting.
Observe the system for leaks, stable flow, unusual noise, and excessive vibration.
Do not force a hose over a fitting that is too large, heat tubing in a way that could damage it, or rely on sealant to compensate for a mismatched connection.
Check these other causes before replacing the pump
If changing to the correct tubing does not restore flow, inspect the rest of the system in this order:
Clean the filter and pump intake
A clogged filter, intake screen, or pump sponge can reduce flow even when the discharge tubing is correctly sized. Rinse reusable filter media as directed; avoid cleaning biological media with chlorinated tap water if doing so would harm beneficial bacteria.
Inspect the impeller chamber
Unplug the pump and follow the service instructions to inspect the impeller. Remove leaves, gravel, string algae, and other debris. Do not pry on fragile components or open sealed sections that the manufacturer does not intend users to service.
Look for leaks and air entry
A loose intake connection, split hose, or poorly seated seal can reduce performance. Air bubbles in the line may indicate a leak on the suction side or a low water level, depending on the pump design.
Confirm the setup and water level
Make sure the pump is installed in the orientation specified by the manufacturer. Confirm that the water level is high enough and that the pump is not being operated dry. Check that the discharge does not rise higher than the pump’s available head capacity.
Check for a full filter, bag, or blocked outlet
A dirty filter, full debris basket, closed valve, or blocked waterfall outlet can create the same symptoms as narrow tubing.
When to replace the tubing or the pump
Replace the tubing when it is visibly kinked, hardened, cracked, collapsed, permanently restricted, or smaller than the manufacturer’s recommendation. Replacing a short narrow section may help, but leaving other small fittings in the line can continue to limit flow.
A replacement pump may be reasonable when the tubing and fittings are correctly sized, the intake and filter are clean, the water level is correct, and the pump still cannot provide the required flow or lift. Choose a replacement based on the system’s required flow at its actual head height—not only the pump’s maximum free-flow rating.
Stop using the pump and seek qualified help if you see damaged wiring, a tripped circuit, water entering electrical connections, burning odors, or signs of overheating. Follow the manufacturer’s electrical and installation requirements.
FAQ
Can narrow tubing damage a pond pump?
It can increase resistance and operating strain, and may contribute to overheating or reduced service life. Follow the manufacturer’s tubing-size requirements and correct the restriction rather than intentionally throttling the discharge with undersized hose.
Is larger pond tubing better than smaller tubing?
Larger tubing usually creates less friction, especially on long runs or systems with significant lift. It still needs a secure, compatible connection to the pump and other equipment.
Why is my pond pump weak after I changed the hose?
The new hose may have a smaller inside diameter, a kink, a restrictive adapter, or a partially blocked fitting. Compare its inside diameter with the pump recommendation and inspect the entire discharge path.
Can I use an adapter to connect larger tubing to a small pump outlet?
A properly designed adapter can connect compatible sizes, but the pump outlet and the narrowest internal passage still limit flow. Use the manufacturer-approved connection method and avoid forcing or poorly sealing fittings.