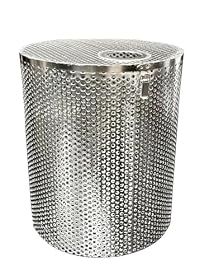
A pond pump usually leaks at the housing because a gasket or O-ring is dirty, damaged, misaligned, or compressed unevenly. Unplug the pump, inspect the seal and housing, then check fittings, clogs, and installation before replacing the pump.
A pond pump leaking at the housing usually has a sealing problem rather than a motor problem. Unplug the pump before touching it, close or block the water flow if possible, and inspect the housing seam, gasket or O-ring, inlet and outlet fittings, and any cracks. Many leaks can be fixed by cleaning or replacing a seal; a cracked housing generally requires a replacement part or a new pump.
Disconnect power and identify the leak
Switch off the pump at the outlet or breaker and keep electrical connections dry. Do not handle the plug or power cord with wet hands. If the pump is hardwired, or if water has entered the electrical connection, have a qualified professional inspect it.
Dry the outside of the pump with a towel, then add a small amount of water or run the pump briefly only if it can be done safely according to the manufacturer’s instructions. Watch for the first wet spot:
Housing seam: Often points to a gasket, O-ring, loose fastener, or damaged mating surface.
Threaded fitting: May be a loose connection, damaged thread, or unsuitable seal.
Tubing connection: Usually involves a loose clamp, incorrect tubing size, or a split hose.
Cord entry or motor casing: Treat this as a serious failure. Do not open or operate the pump; replace it or arrange professional service.
Check the gasket or O-ring first
The main housing seal can leak when it is dirty, pinched, flattened, hardened, or installed out of position. Remove the housing cover according to the pump manual and inspect the seal for cuts, twists, flat spots, grit, algae, or brittleness.
Clean the sealing groove and both mating surfaces with a soft cloth. Do not scrape plastic with a knife or use solvents that the manufacturer does not approve. Reinstall the original seal evenly, making sure it sits completely in its groove. If the seal is visibly damaged, stretched, flattened, or hard, replace it with a seal made for the exact pump model.
Some seals require a compatible silicone lubricant, while others should be installed dry. Follow the manufacturer’s instructions rather than applying petroleum grease, which can damage some rubber compounds.
Product prices and availability are accurate as of the date/time indicated and are subject to change. Any price and availability information displayed on Amazon.com at the time of purchase will apply to the purchase of this product.
Inspect the housing and fasteners
Look closely at the housing seam, screw holes, clips, and threaded ports. Fine cracks may only open when the pump is pressurized. Also check for:
A warped cover or housing half
Missing or cross-threaded screws
Unevenly tightened fasteners
Stripped plastic threads
A damaged gasket groove
Mineral buildup preventing the cover from seating flat
Tighten fasteners gradually in a crisscross pattern when the design allows it. Do not overtighten plastic screws or bolts; excessive force can distort the housing or crack it. If the housing is cracked, badly warped, or has damaged threads, sealant is usually only a temporary patch. Use the manufacturer-approved replacement housing or replace the pump.
Check for a clog or restricted flow
A clogged intake screen, filter, impeller, or discharge line can increase pressure or cause abnormal water movement around the housing. With power disconnected, check the pump intake, prefilter, impeller chamber, tubing, and pond filter for leaves, gravel, algae, and sludge.
Clean reusable filter material as directed. Replace a filter that is torn, collapsed, or no longer holds its shape. Do not run a pump without the required strainer or filter, and do not remove protective screens unless the pump instructions allow it.
A blocked discharge line can also place extra stress on fittings and seals. Confirm that the tubing is open and that valves are not accidentally closed.
Check tubing, adapters, and seals around the ports
A leak near the housing may actually start at an inlet or outlet fitting and run along the pump body. Confirm that:
Tubing matches the pump connection size.
Hose clamps are secure but not cutting into the tubing.
Thread sealant is used only where the manufacturer calls for it.
Rigid plumbing is not pulling sideways on the pump ports.
Do not use pipe tape to compensate for damaged threads or force incompatible fittings together. Replace cracked tubing, worn washers, or damaged adapters. Support long or heavy plumbing separately so it does not load the pump housing.
Confirm the pump is installed correctly
Installation problems can cause repeated housing leaks even after a new seal is fitted. Check the instructions for the pump’s operating position and water conditions.
For a submersible pump, verify that it is fully submerged when required and resting on a stable surface rather than loose gravel. For an external pump, confirm that it is mounted level and that the inlet is properly flooded or primed if the design requires that setup. A pump running dry or with insufficient water can overheat seals and damage internal components.
Also check that the pump is not being used above its specified lift, flow, temperature, or fluid conditions. Excessive restriction, incorrect plumbing, or running against a closed valve can contribute to leaks and premature seal failure.
Decide whether to repair or replace the pump
A replacement gasket, O-ring, washer, or fitting is reasonable when the housing is intact and the pump otherwise starts and runs normally. Use the exact replacement part specified for the pump; seals that look similar may have different dimensions or materials.
Replace the housing or pump when you find a crack, warped sealing surface, stripped threads, water at the cord entry, repeated leaks after a correct seal replacement, unusual grinding, burning odor, tripped electrical protection, or a motor that overheats. A pump that has been submerged beyond its approved depth or has suffered water intrusion into the motor should not be returned to service without proper inspection.
After repair, run the pump while watching the housing and all connections. Keep the electrical plug, junctions, and cord connections protected from water and positioned as required by the manufacturer. If the leak returns, disconnect power rather than repeatedly tightening the housing.
When to call a professional
Stop troubleshooting and seek qualified help if the pump is hardwired, the circuit trips, the cord or plug is damaged, the motor casing leaks, or water may have reached an electrical connection. Pond pumps combine water and electricity, so a seal repair does not make an unsafe electrical setup safe. Follow the pump manual and applicable electrical requirements for outdoor installations.
FAQ
Can I use silicone sealant to stop a pond pump housing leak?
Only use sealant if the pump manufacturer specifically approves it. Sealant can hide a damaged gasket or prevent the housing from seating correctly. A worn gasket, O-ring, or cracked housing should normally be replaced with the correct part.
Why does my pond pump leak after I replace the gasket?
The gasket may be the wrong size, twisted, pinched, dirty, or installed in the wrong groove. Also check for a warped cover, cracked housing, damaged threads, uneven fastener tightening, excessive plumbing strain, or a clog that is restricting flow.
Is a leaking pond pump dangerous?
It can be, especially if water reaches the plug, cord entry, junction box, or other electrical connections. Disconnect power before inspecting the pump, keep connections dry, and have a qualified professional handle damaged or hardwired electrical components.
Should I replace the whole pump if the housing is cracked?
Usually, yes, unless the manufacturer supplies a compatible replacement housing and the motor and electrical parts remain in good condition. Do not rely on sealant as a permanent repair for a pressurized or submerged cracked housing.